TACO install - aio node
Machine 접속방법
root 계정으로 자신의 머신에 접속한 후 etherpad 에 공유해 놓은 비밀번호를 입력한다.
#MACHINE_IP에 배정받은 가상머신의 ip주소를 적는다.
$ ssh root@MACHINE_IP
tacoplay 설정
Tacoplay 받아서 준비하기
$ sudo yum install -y git selinux-policy-targeted bridge-utils epel-release
$ sudo yum install -y python-pip
$ sudo pip install --upgrade pip==9.0.3
$ git clone https://github.com/openinfradev/tacoplay.git
$ cd tacoplay/
$ ./scripts/prepare.sh ~/tacoplay/inventory/sample/armada-manifest.yaml
하위 프로젝트들 fetch
- armada : armada 설치에 필요한 소스
- ceph-ansible : ceph 설치에 사용되는 ansible playbook
- kubespray : kubernetes 설치에 사용되는 ansible playbook
- charts : kubernetes위에 openstack을 배포하는 데 필요한 helm chart
$ ./fetch-sub-projects.sh

extra-vars.yml 파일 수정
ansible-playbook 실행 시 필요한 변수 값을 재정의한다.
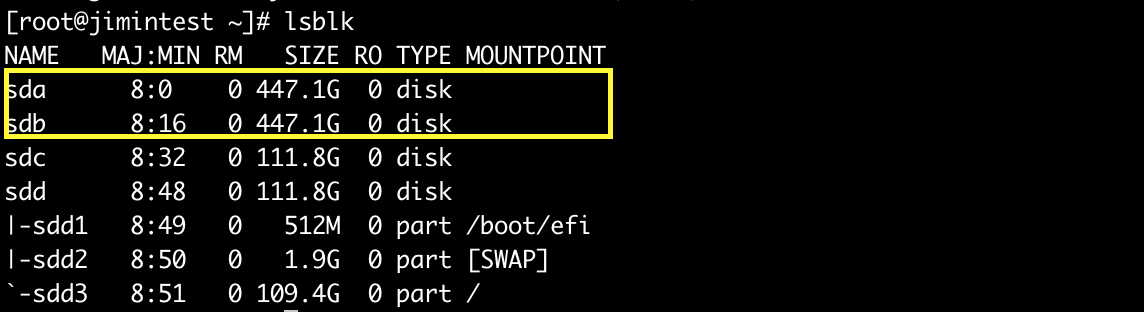
- lsblk 명령어를 통해 ceph에서 사용할 수 있는 디스크를 확인한다.
- 아무것도 mount되어있지 않은 디스크 중에서 용량이 가장 큰 2가지를 선택한다.
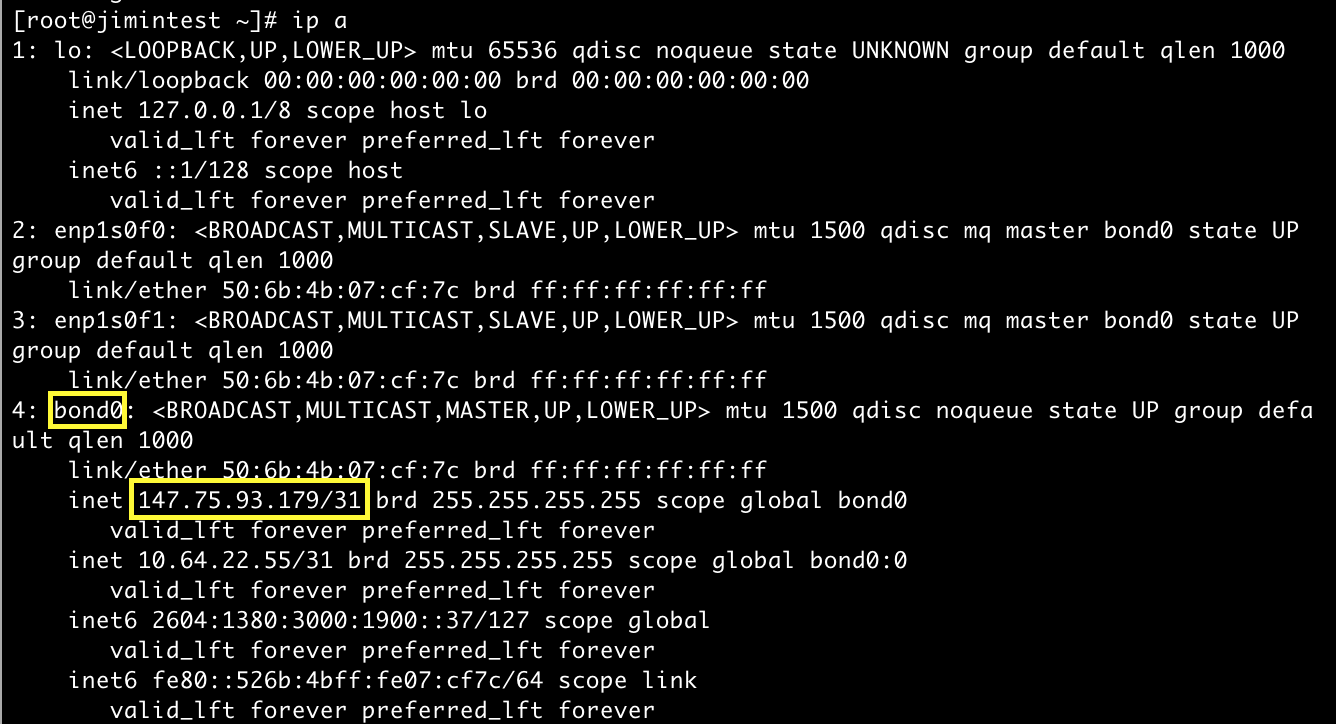
- host의 ip주소를 확인한다.
- 위에서 확인한 값들로 extra-vars.yml 파일의 다음 값들을 수정한다.
- monitor_interface: bond0 확인
- public_network & cluster_network: 호스트의 네트워크 대역 입력
- lvm_molumes를 변경: ceph용 디스크명 입력
$ cd ~/tacoplay/inventory/sample
$ vi extra-vars.yml

- armada-manifest.yaml 수정
예시 파일로 주어진 armada-manifest.yaml에서는 모든 차트의 source 디렉토리 위치
가 /home/centos/tacoplay/... 로 되어있다.
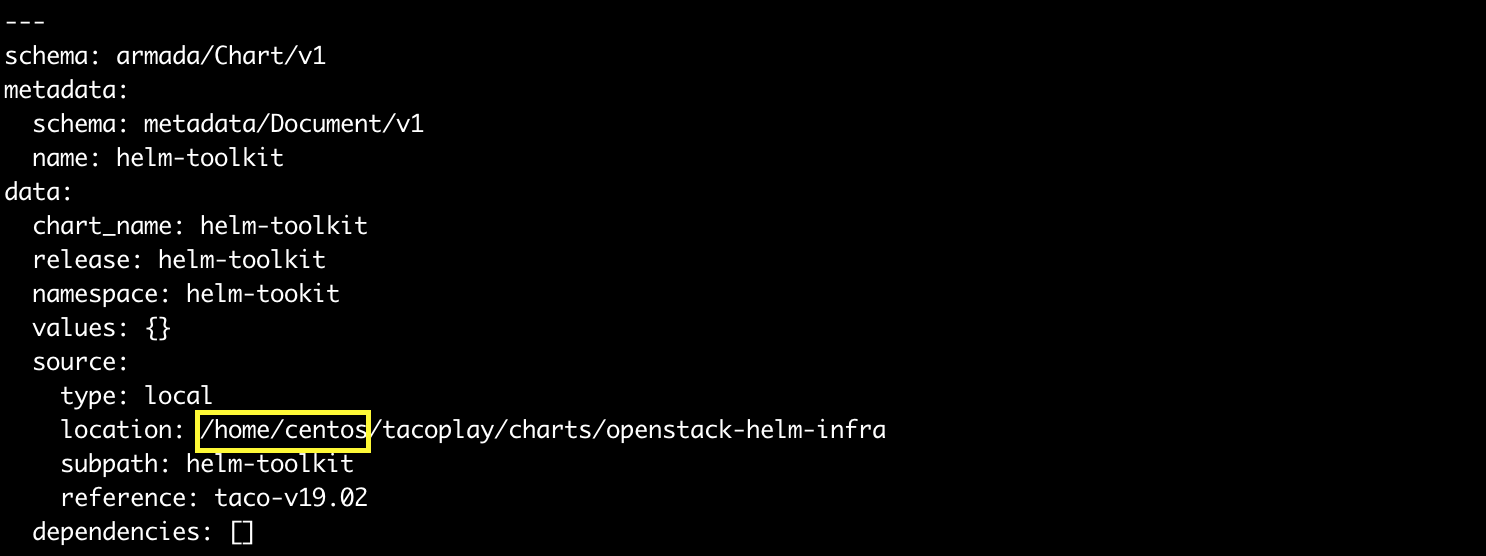
이를 자신의 환경에 tacoplay가 설치되어 있는 경로로 수정 한다. 현재 실습 환경에서는 tacoplay는 /root 디렉토리 밑에 설치되어 있으므로 아래와 같은 sed명령어를 통해 변경할 수 있다.
$ cd ~/tacoplay
$ sed -i "s#/home/centos#/root#g" inventory/sample/armada-manifest.yaml
OS 설정
호스트 파일 설정
/etc/hosts 파일을 열고 127.0.0.1에 “taco-aio”를 추가해준다.
$ sudo vi /etc/hosts
## TACO ClusterInfo
127.0.0.1 taco-aio localhost localhost.localdomain localhost4 localhost4.localdomain4
TACO 설치
TACO playbook 실행에 필요한 패키지 설치
아래 코드는 순서를 지켜서 실행해야함.
cd ~/tacoplay
sudo pip install -r ceph-ansible/requirements.txt
sudo pip install -r kubespray/requirements.txt --upgrade
sudo pip install -r requirements.txt --upgrade
Taco 설치
$ cd ~/tacoplay
$ ansible-playbook -b -i inventory/sample/hosts.ini -e @inventory/sample/extra-vars.yml site.yml
ansible-playbook 옵션 설명
- -i : 사용할 inventory 파일 지정
- -e : 실행시간에 변수 값 전달
TACO 설치 확인
Pod 상태 확인
$ kubectl get pods -n openstack <- pod 상태 확인
$ watch 'kubectl get pods -n openstack' <- watch 명령어를 통해 pod의 상태를 실시간으로 확인
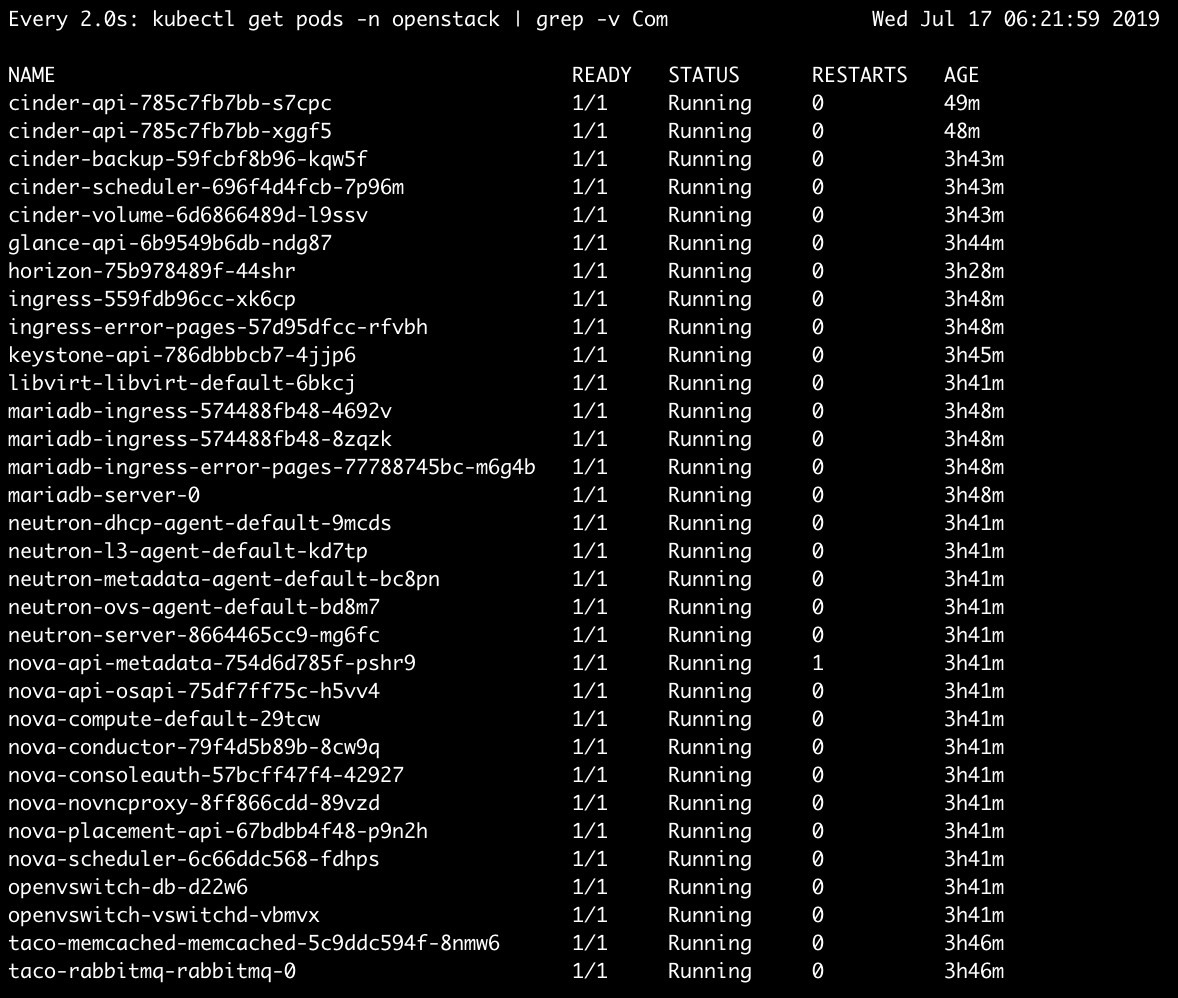
$ watch 'kubectl get pods -n openstack | grep -v Com' <- Completed 된 상태의 pod를 제외하고 실시간으로 확인
다음 사진과 같이 pod가 다 뜨게 되면 taco 설치가 완료된 것이다. (kubectl get pods -n openstack | grep -v Com 실행결과)
Horizon 접속
Openstack dashboard인 Horizon에 접속해본다.
- http://HOST_IP:31000 <- 배정받은 machine의 ip를 넣어준다.
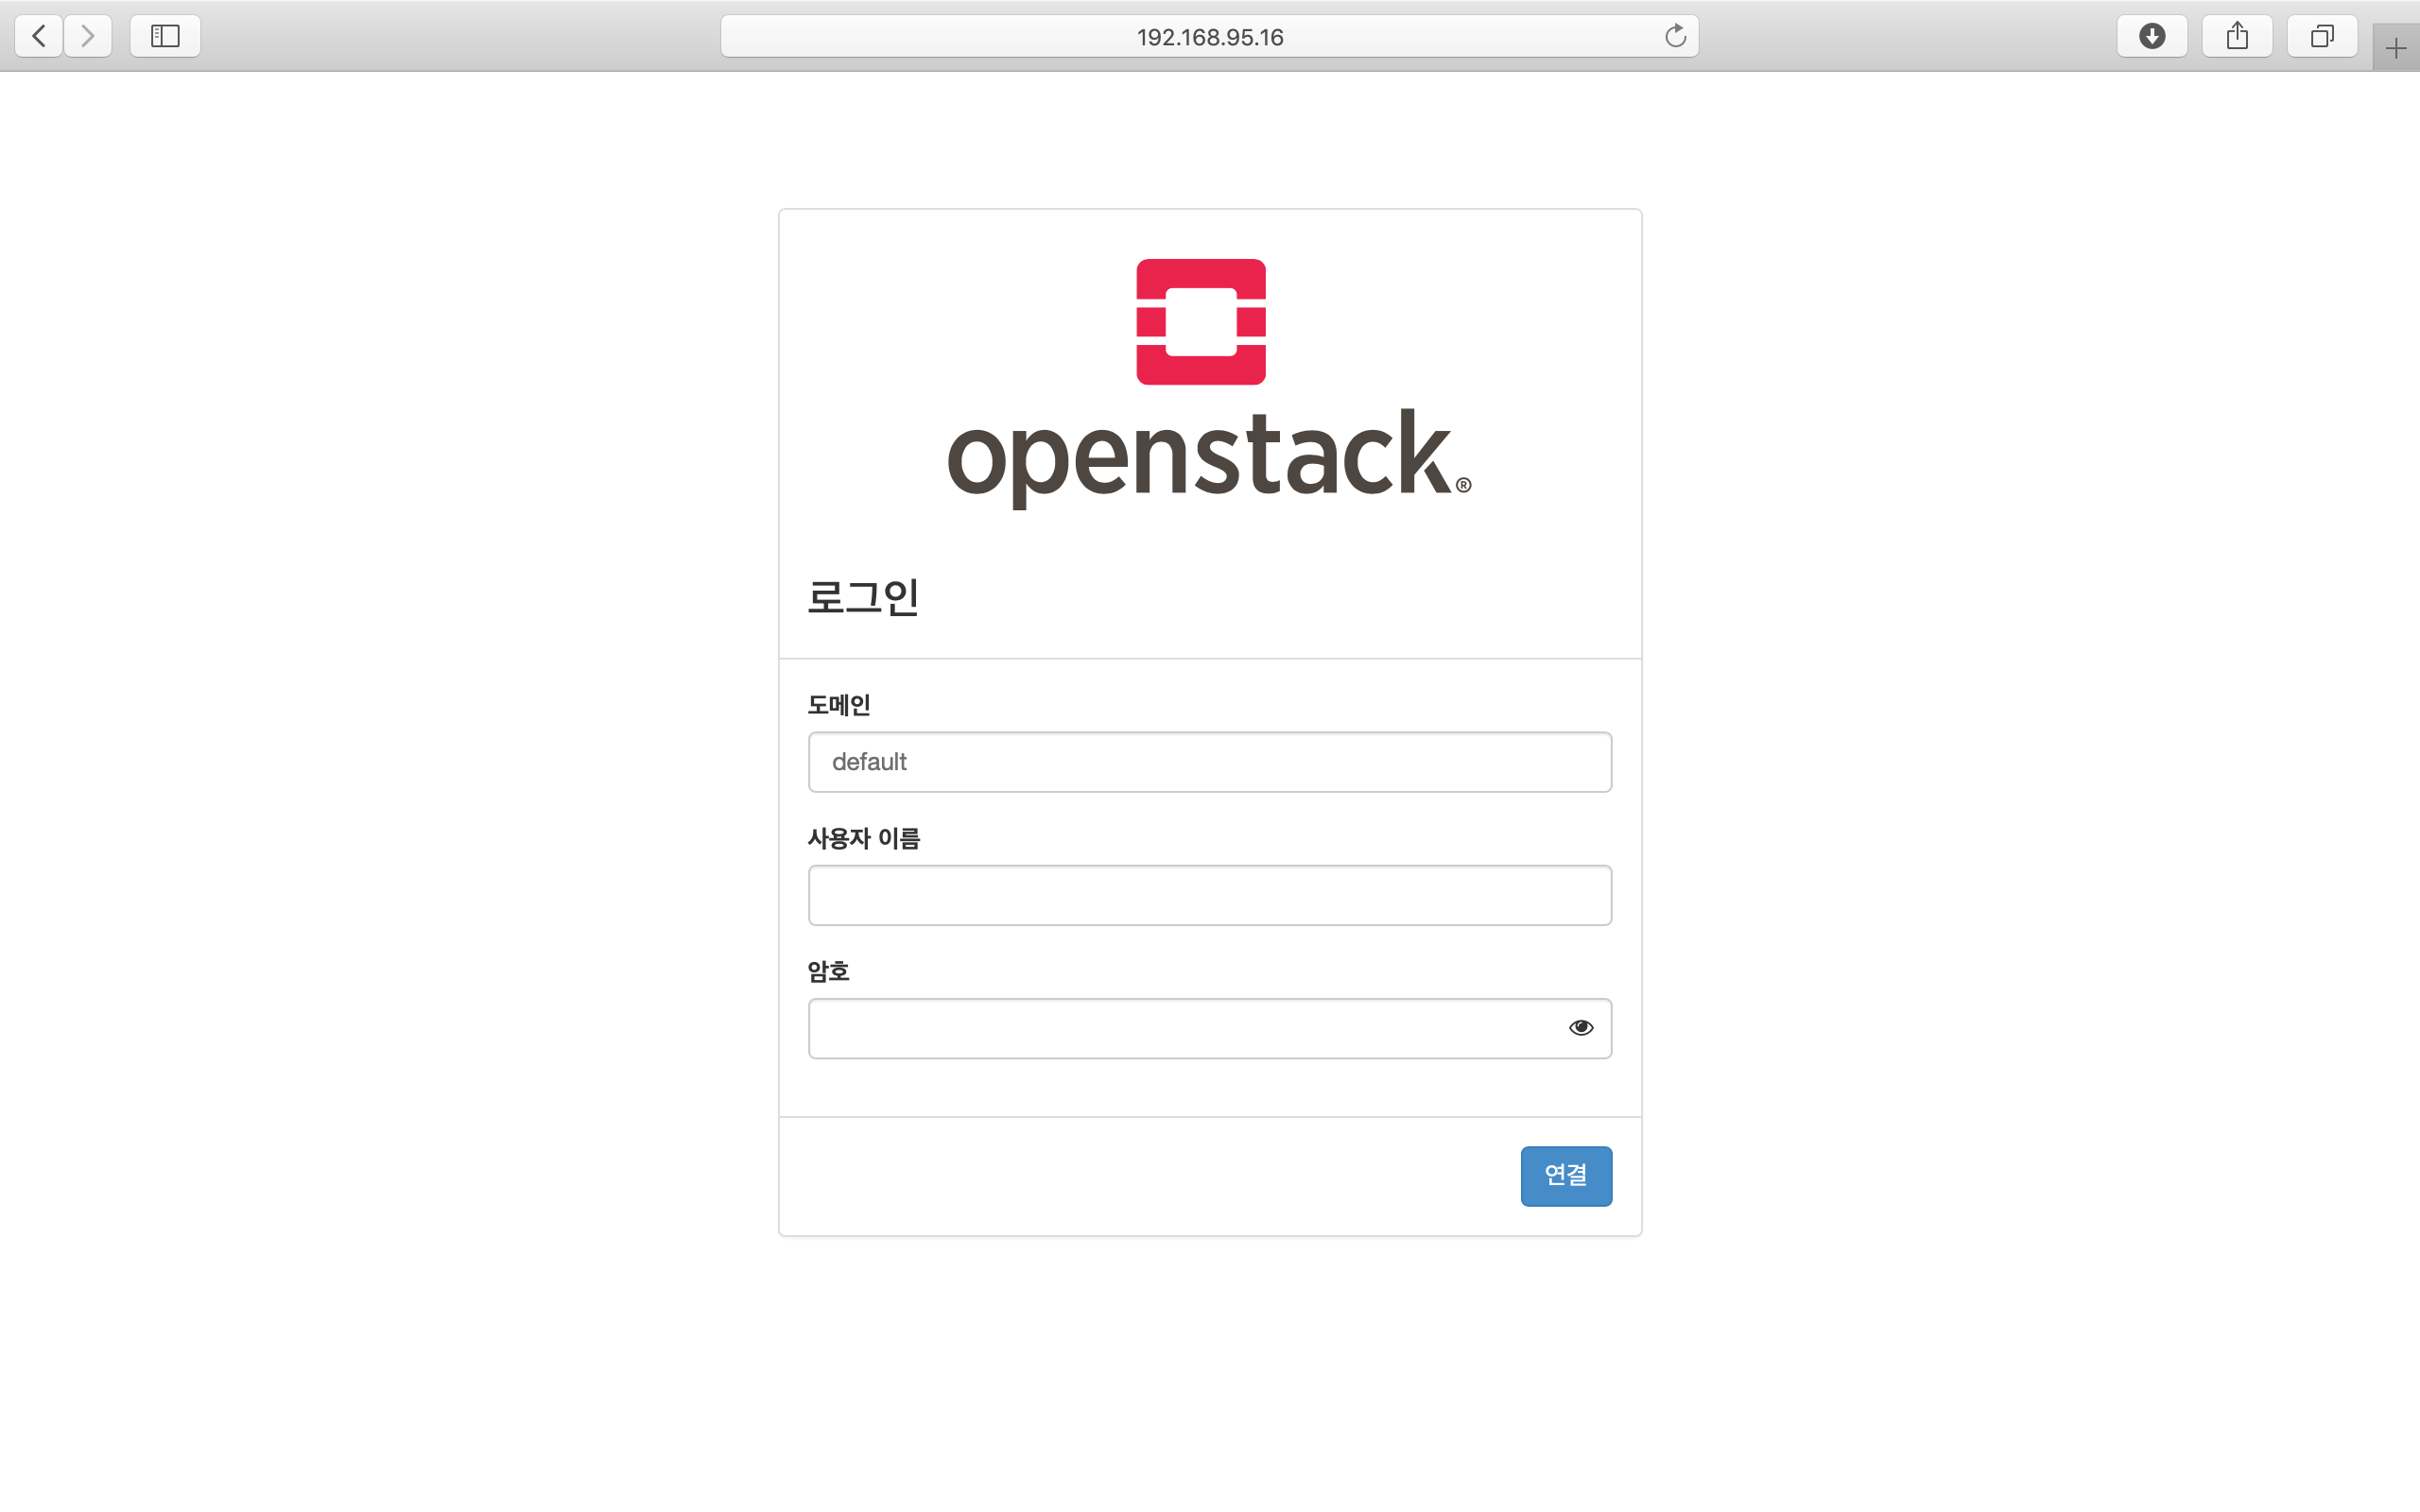
계정정보
- domain : default
- id : admin
- pw : password
Network 설정
Script를 통해 Openstack에서 사용할 bridge 및 IP masquerading을 위한 iptables rule 추가 등의 작업을 수행한다.
$ cd ~/tacoplay
$ ./scripts/init-network.sh
Openstack 설치 검증
$ cd ~/tacoplay
$ scripts/taco-test.sh
위의 script를 수행하면 다음과 같은 task들을 수행하여 Openstack이 정상 동작하는지 검증하게 된다.
- (가상) Network 및 Router 생성
- Cirros Image upload
- SecurityGroup 생성
- Keypair Import
- VM 생성 후 floating IP 추가
- Volume 생성 후 VM에 추가
VM 생성 후
생성된 VM 확인하기
다음 명령어를 통해 taco-test 스크립트를 돌려 생성된 VM을 확인할 수 있다. 결과 Networks 란에서 생성된 VM 의 floating IP 주소를 확인한다.
$ . tacoplay/scripts/adminrc
$ openstack server list

생성된 VM에 접속, 외부 통신 확인
ssh로 VM 에 접속 후, 네트워크 접속 상태를 확인하기 위해 ping 테스트를 수행한다.
[root@taco-aio ~]# ssh cirros@10.10.10.14    (<- 생성된 VM의 ip주소를 넣는다.)

# VM 내부에서 수행
$ ping 8.8.8.8
PING 8.8.8.8 (8.8.8.8): 56 data bytes
64 bytes from 8.8.8.8: seq=0 ttl=53 time=1.638 ms
64 bytes from 8.8.8.8: seq=1 ttl=53 time=1.498 ms
64 bytes from 8.8.8.8: seq=2 ttl=53 time=1.147 ms
64 bytes from 8.8.8.8: seq=3 ttl=53 time=1.135 ms
64 bytes from 8.8.8.8: seq=4 ttl=53 time=1.237 ms
K8S pod test
Scale-Out 테스트
Deployment 설정을 수정하여 간단히 pod의 수를 조절할 수 있다.
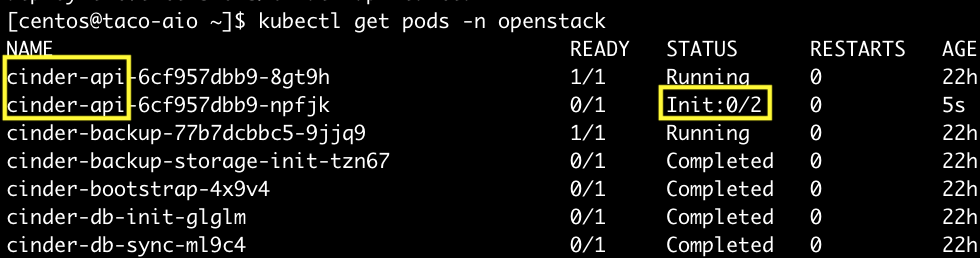
cinder-api의 replicas를 2개로 증가시켜 본다.
$ kubectl edit deploy cinder-api -n openstack
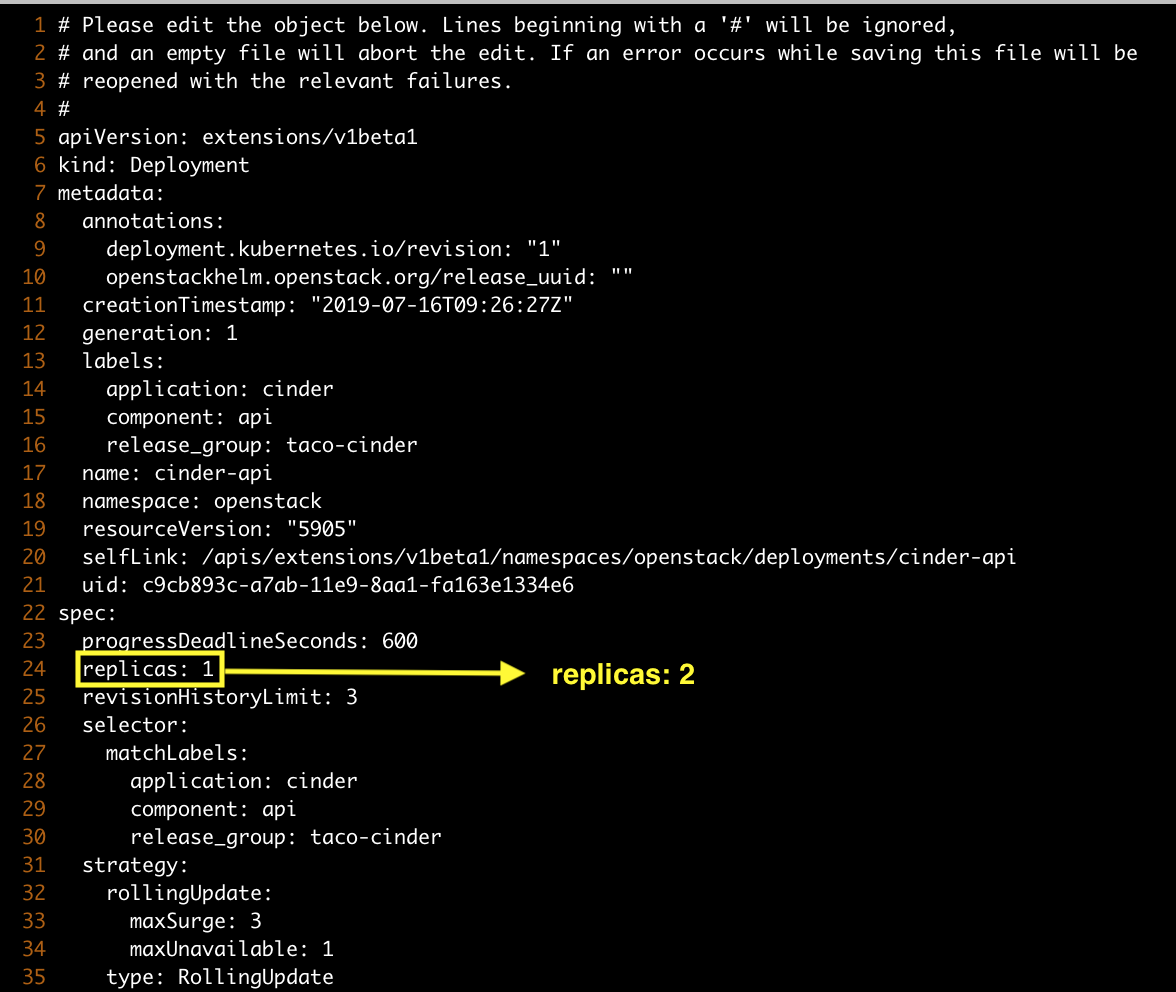
cinder-api pod의 수가 2개로 늘어나는 것을 확인할 수 있다.
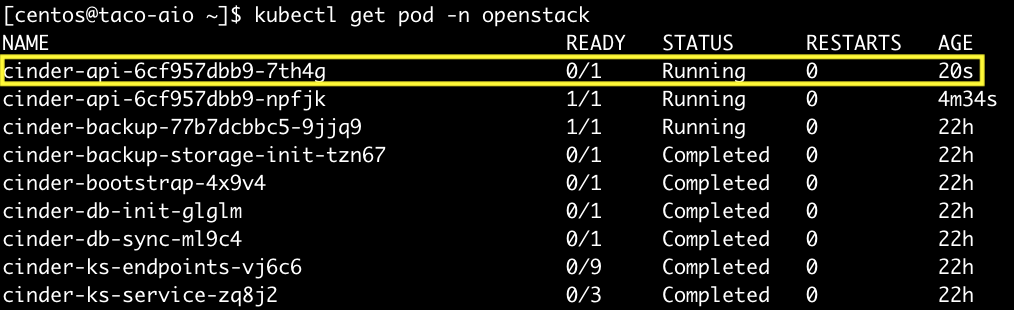
Self-Healing 테스트
pod를 삭제시켜도 다시 복구 되는 것을 확인해본다.
$ kubectl delete pod -n openstack cinder-api-6cf957dbb9-8gt9h
> pod "cinder-api-6cf957dbb9-8gt9h" deleted

$ kubectl get pod -n openstack
cinder-api pod가 새로 생성되고 있는 것을 확인할 수 있다.